
Following on from our previous blog post in the simple automation series, this week I want to give a reminder of one of the best bang for back automation we’ve found: email rules.
What are email rules? Put simply, they are a predefined set of instructions as to what happens to any email received into your inbox. These rules can be simple, such as moving emails from a specific sender into the junk folder, or complex, such as filtering automatic notifications from a project management system so that you only see notifications relevant to you (some project management systems might have their own email settings, but setting up email rules is often easier and quicker).
Both Outlook and Gmail have excellent support for email rules, and we’ll cover instructions for both below. If you’re using a different email client these options are almost certainly available, but more advanced functionality may be missing.
Some examples of common rules:
- Put newsletter emails (such as ours) into their own folder so they don’t interrupt you during productive hours, and you can peruse them at leisure when it suits you.
- Forward invoice emails containing PDFs to your accounting system so they are automatically entered into your accounting system and not forgotten about.
- Finally, the most common: the out-of-office automatic reply for when you’re on holiday.
So how do we create email rules?
Creating Email Rules in Outlook
As a simple example for a rule to create in Outlook, let’s say we want to send every newsletter we receive from Corey Quinn (who runs the Last Week in AWS newsletter) to our newsletters folder for later reading.
First, let’s select an email as a template for those we want to process in the future. This prevents us having to fill in a lot of information manually.

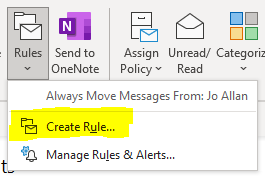
Then, open the Rules menu from the top bar and select “Create Rule”:

Because we selected a template email before, a lot of the fields in the Create Rule window are pre-filled for us. We can tweak things as we need, however. In my example, I changed the “Subject contains” field to catch every email this newsletter sends, rather than the particular episode number the template email has.
We also need to pick some actions to perform when we receive a matching email. By far the most common action is to move the email to a particular folder, so we can click “Select Folder…” and find the folder we need. Alternatively, if we click “Advanced Options” there is a huge range of other actions available to us.

Finally, click “OK” to create the rule. We’re done!
Creating Email Rules (Filters) in Gmail and Google Suite
Creating rules in Gmail is even simpler than creating rules in Outlook, with one catch: you have to know where to look.
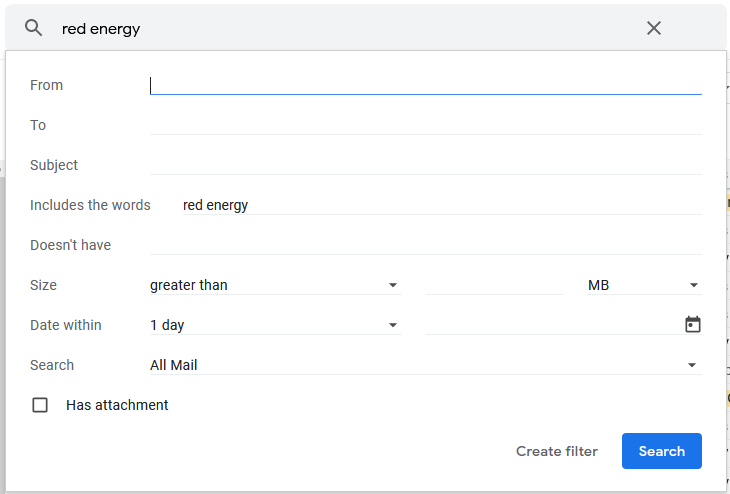
First, click on the sliding bars icon in the search bar.

Creating an email rule is done in two parts in Gmail. The first part is to define the search terms that will narrow down the emails you want to filter. Here, I’ve typed in the name of an electricity provider I don’t want to lose track of the bills from. Then, click “Create filter”.
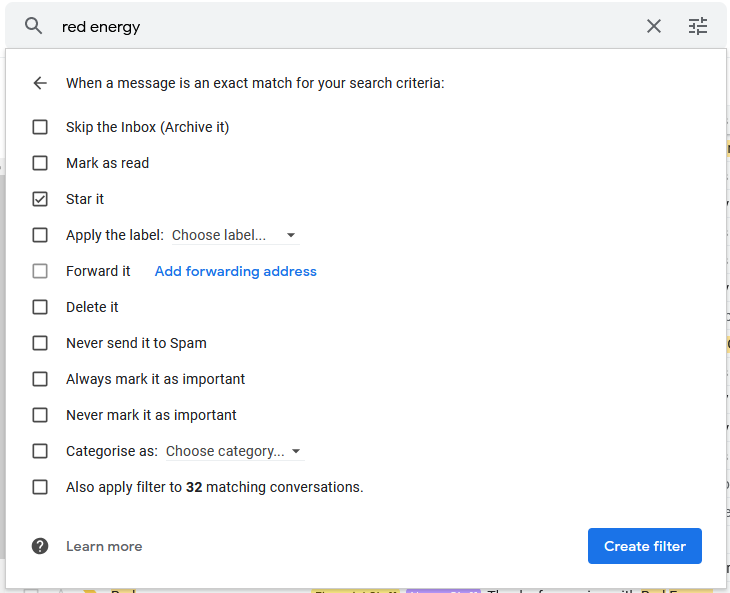
The next step is to decide what actions to take. I want to star these emails so they’re brought to my attention and can get paid quickly. You might want to apply a label, or archive the email without it hitting your inbox. Once you’re done, click “Create filter”.
And we’re done!
Conclusion
Whether you are new to the concept of automatic email rules, or you’ve been using them for years, it’s worth setting aside a bit of time now to set some up to save yourself some more time now. And we find that going over the rules regularly (perhaps once a month) helps maintain them and keep them useful and working for you.
What are the email rules you find most useful? Let us know in the comments!